Pages

Wednesday, August 22, 2018

One Card Two Ways

One Card Two Ways.....and a little more news at the end


Hi Everybody! Today I made One card Two ways using two different embossing folders. The Tufted Dynamic Textured Impressions Embossing Folder and the Basket Weave Dynamic Textured Impressions Embossing Folder are featured for this card. I've used some retired paper and ribbon for this project; however any color card stock and ribbon would look great with this technique.


Cut paper for card base. 8 1.5 x 5 1/2
Fold in half. 4 1/4 x 5 1/2
Cut layer of same color. 5 1/4 x 4
Pick your folder and run through Big Shot.


Using the Swirly Bird Stamp Set, stamp the solid circle on whisper white card stock, 
then stamp your sentiment over the top.  
Next, stamp flowers and leaves from the same set. 
Run your sentiment through the Big Shot using a Stitched Circle. 
Next run a Scalloped Circle a little larger then the Stitched Circle through the Big Shot, 
in the same color as your card base. 
Now run your flowers through the Big Shot using the coordinating framelits. 


 Sponge your scalloped circles, to give them dimension, in a slightly darker color. 
Glue circles together. Also glue the flowers and leaves on the circles.
Put ribbon around the card layer and tape to the back, add dimensionals.
Adhere to card base. 
Add your circles and add more ribbon and enamel dots, or whatever "Bling" you would like, 
to finish up this lovely card.


A little update on my granddaughter: She is now three months old and safely home enjoying her mommy and daddy! She has grown to 6lbs 3oz and 18.5" long! That's quite a ways from where she started, (2lb 3oz and 14.5" long). We are so blessed to have her and her momma safe and healthy.


I hope you enjoyed today's post!
Have a great week!!

Deb B
The Crafting Fool

Product List

Thursday, August 9, 2018

Sympathy Card Country Style

Good Morning All!

I hope you are all well and happy crafting! Today's post is a sympathy card featuring the Country Livin' and the Jar of Love Stamp Sets. So many pretty flowers! I love how the boots become the vase! I got my inspiration for this card from a poster on Pinterest, unfortunately I was unable to get their name. I had a scrap left from cutting out squares in Dapper Denim Card Stock and just loved how it looked like a window, so that's what it became in this card!  I love how this card could be used for any occasion.


I  made this card for my son and his girlfriend, she lost her father a few days ago. She is a bit of a country girl so I immediately thought of these boots!

Thanks for stopping by! Have a wonderful week!
Deb B
The Crafting Fool

Product List

Thursday, August 2, 2018
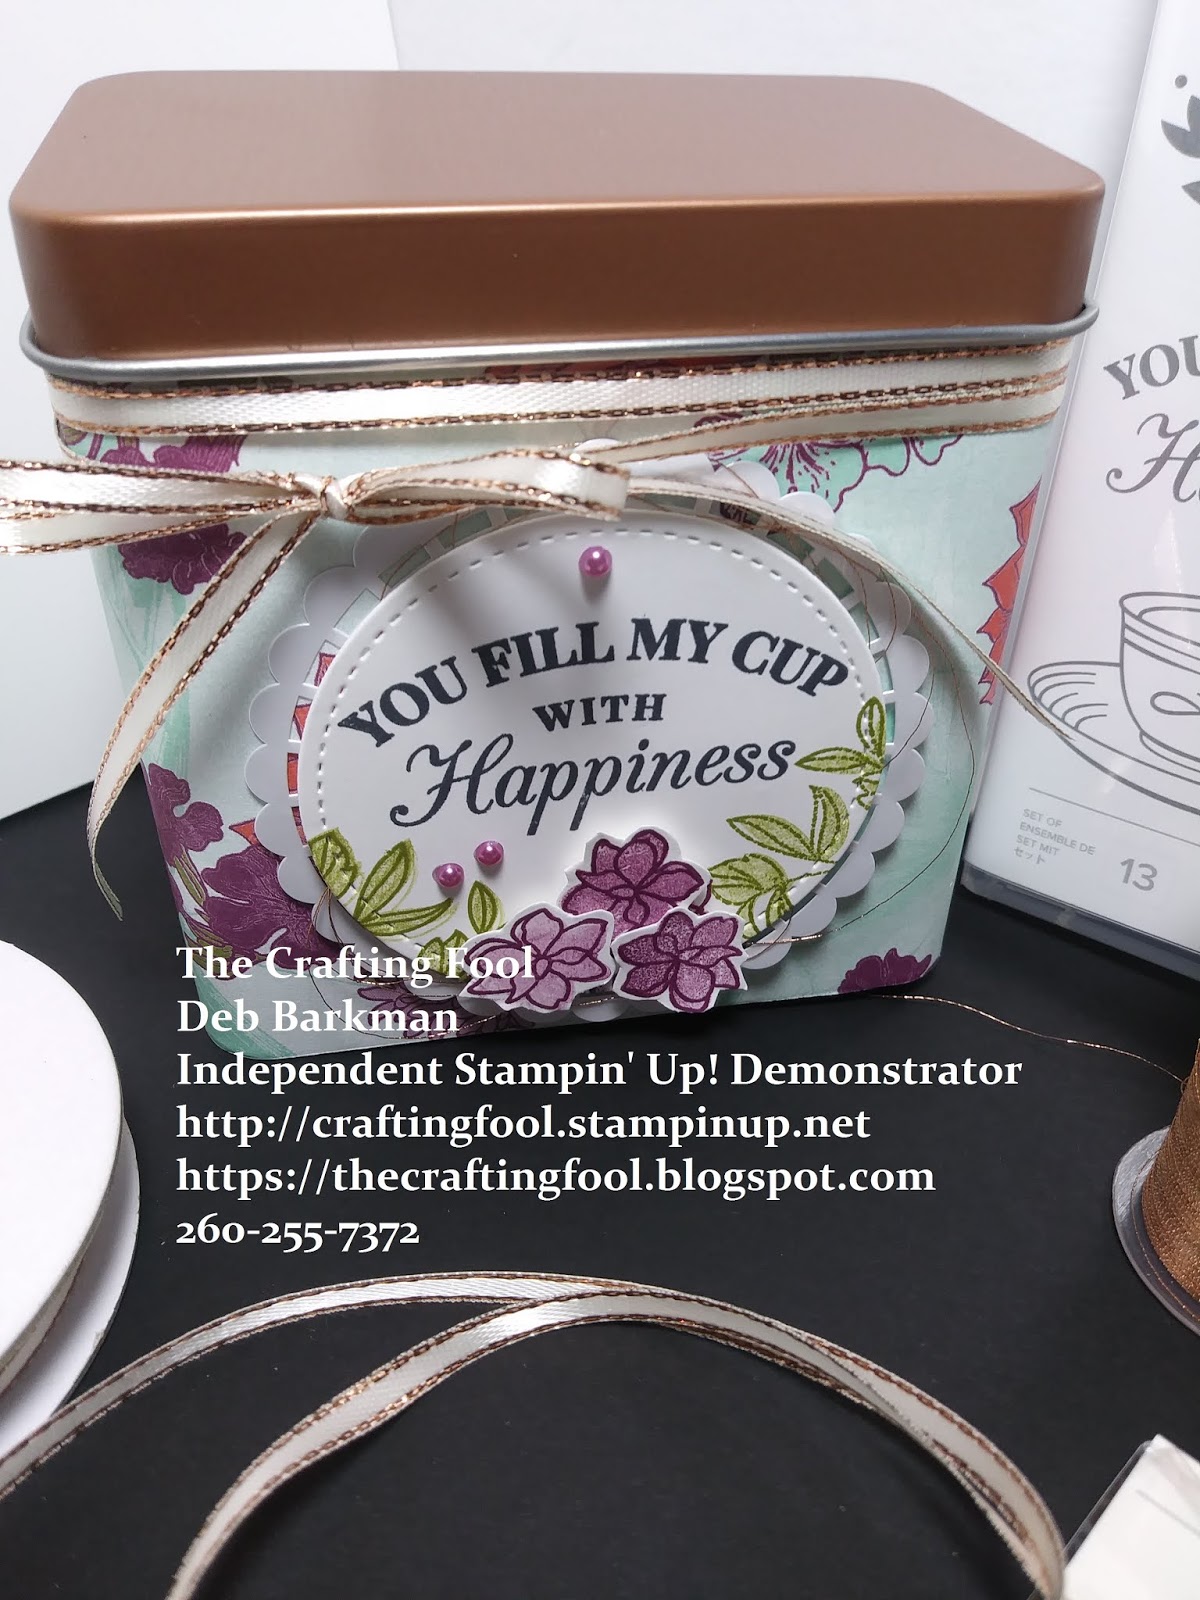
Time for Tea

Beautiful Tea Tin and 3"x 3" Gift Card

Hello Stampers!

Today I prepared a cute little project for you. I have decorated one of our Copper Tea Tins and made a 3"x 3" gift card to go with it. I just love the new Tea Room Specialty Paper and Time for Tea Stamp Set. 
The tin is a great way to give a small gift of tea bags, sweet treats or even six 3"x 3" cards with envelopes. 
It was a lot of fun creating this one and I am pleased how it all turned out.


Copper Tea Tin
This project was a breeze. All you need to do is pick your dsp, cut a 3 1/2" x 12" sheet. Add double sided Tear and Tape along all the sides. Adhere it to the Tin. Stamp your sentiment on a scrap of Whisper White Card Stock, (to get the flowers and leaves two toned I just stamped off one time)!
 Then cut out, using a Stitched Circle. Cut a Scalloped Circle slightly larger in Rich Razzleberry Card Stock. Glue together. Add some Artisan Pearls and three flowers to the front. Turn over and add Copper Metallic Thread, and adhere to a Pearlized Doily with some Dimensionals.


Glue the whole embellishment to the front of your Tin using Tom Bow multipurpose liquid glue. Place a ribbon around the Tin and your done!


3"x 3" Gift Card
For your 3"x 3" card base you will need a 3"x 6" piece of Whisper White Card Stock, folded in half. A scrap of Rich Razzleberry Card Stock, cut out with a scallop circle. A Whisper White Card Stock stamped with your sentiment and cut out with a stitched circle. Use a 3"x 3" piece of Tea Room Specialty Paper cut at 2 1/4" then turn the 3/4" piece over and adhered to the card base at the bottom, with the "right side" adhered above it. Wrap some Tea Room Ribbon around at the seam and make a bow. Adhere your sentiment with Dimensionals. Stamp and cut out another flower and to adhere to the bottom and add an Artisan Pearl.  Your done!


What a lovely little gift for a friend!

I hope you enjoyed today's blog post.

Have a great week!!
Deb B
The Crafting Fool

Product List